
Articles » How to take pictures of your computer screen
How to take pictures of your computer screen

Daily communication through images has never been more relevant than today, and most people can easily share photos through smartphones and tablets. However, image sharing through the computer can be irreversible, and it can be difficult to get the images to be collaborative.
In this guide, we review the various options for taking pictures as well as the possibilities for easy sharing.
Picture of one's screen
If you want to take a picture of one's screen, there are a number of different options. Windows systems have their own integrated tool for this, and in addition, there are also some user-friendly software with expanded features.
Windows' cutting tool
The cutting tool is one of Windows's most underestimated tools, and is relatively user-friendly to use.
1. Prepare your photo
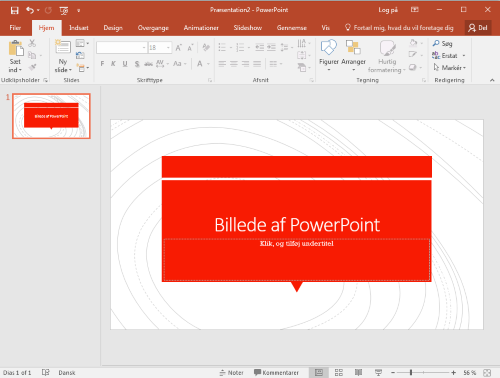
For example, if you want to take a picture of a program, start opening the program, and optionally open the specific features that you want to image. As an example, we use Microsoft PowerPoint as the program we want to take pictures of.
2. Locate Windows Clip Utility
Open the Windows search box, located at the bottom left of the Windows toolbar (Windows 10 users just press the toolbar's search box). Then search for " cutting tool ".

3. Open the rock tool
After finding the rock tool, it just has to open and it would look like the following

4. Select the desired area
With the clip tool, just select the area you want to save a picture of.

You select the area by left clicking and dragging the mouse. As soon as the mouse is released, the clip will open.
5. Extras
It is possible to make simple image changes of your chosen image. For example, if you want to mark a specific area that the recipient should be aware of.

6. Save the clip
If the picture looks as it should, then it can be saved. Of course, it is possible to mark a new area if the image is not as it should be. This is done by pressing " New" at the top of the clip tool.

As seen above, just press " File" and then " Save as". Name the image and choose which folder the image is to be stored in. It is also possible to select different image formats, but we recommend using the default settings.
7. Finished and split
With the above steps over, one's image is ready to be shared. How to share your image is up to yourself - whether it's over email, Facebook or other sharing services, so it's pretty painless, as we've saved the image in a format that most sharing services support.
Alternative methods
If you want to take a picture of the same screen, the cutting tool can be used properly. But there is a more popular method.
1. Print Screen
Touch "Print Screen" on the keystroke (usually located at the top right of F12). There is no indication from Windows when you press the Print Screen, but the image is taken.
2. Open Paint
Use the search box at the bottom left of the toolbar (or just at the bottom of the toolbar if you use Windows 10) and search for Paint program and click it.

3. Insert the image
Touch " Insert", which is placedt in the upper left of Paint. Select again "Insert" and your image would like to appear.

4. Save the image
Touch the diskette icon that is located above the "Insert" function.

Select which image format you want to save the image and which folder to save the image to and press "Save." The image is now saved and ready for opening and sharing.
Good programs to take pictures
It's no secret that the above workflows may seem a bit unimaginable, but fortunately, programs have been developed that make these work processes easier. At Downloadcentral.dk we have a large assortment of help tools to take pictures, and here are some of our favorites.
Greenshot is a merging of the mowing tool and the print screen feature. With this software you can save and crop your images quickly. You choose whether you want to take a picture of the entire screen - or whether it should be a specific area. The image can then be saved in most image formats, and can therefore be shared with friends, colleagues and family members.
Postimage can be a bit of the same as Greenshot. But distinguishes itself by having features to edit and upload one's pictures online. The program also has smart shortcuts, so just press F7 to take a screenshot. The advantage of this is, among other things, that the program is not in the way of one's image.
Dropbox is our favorite file sharing program and can not be used to take a picture. But it's obvious to use to share one's pictures. Dropbox offers up to 2GB of data for free for all users, and therefore it's possible to share incredible images. Dropbox creates a folder where you can place one's pictures and they are then stored in the cloud. The folder can be shared with those you want, which means that you have free access to view the different images. As they are hidden in the cloud, Dropbox also works as a backup of one's pictures.