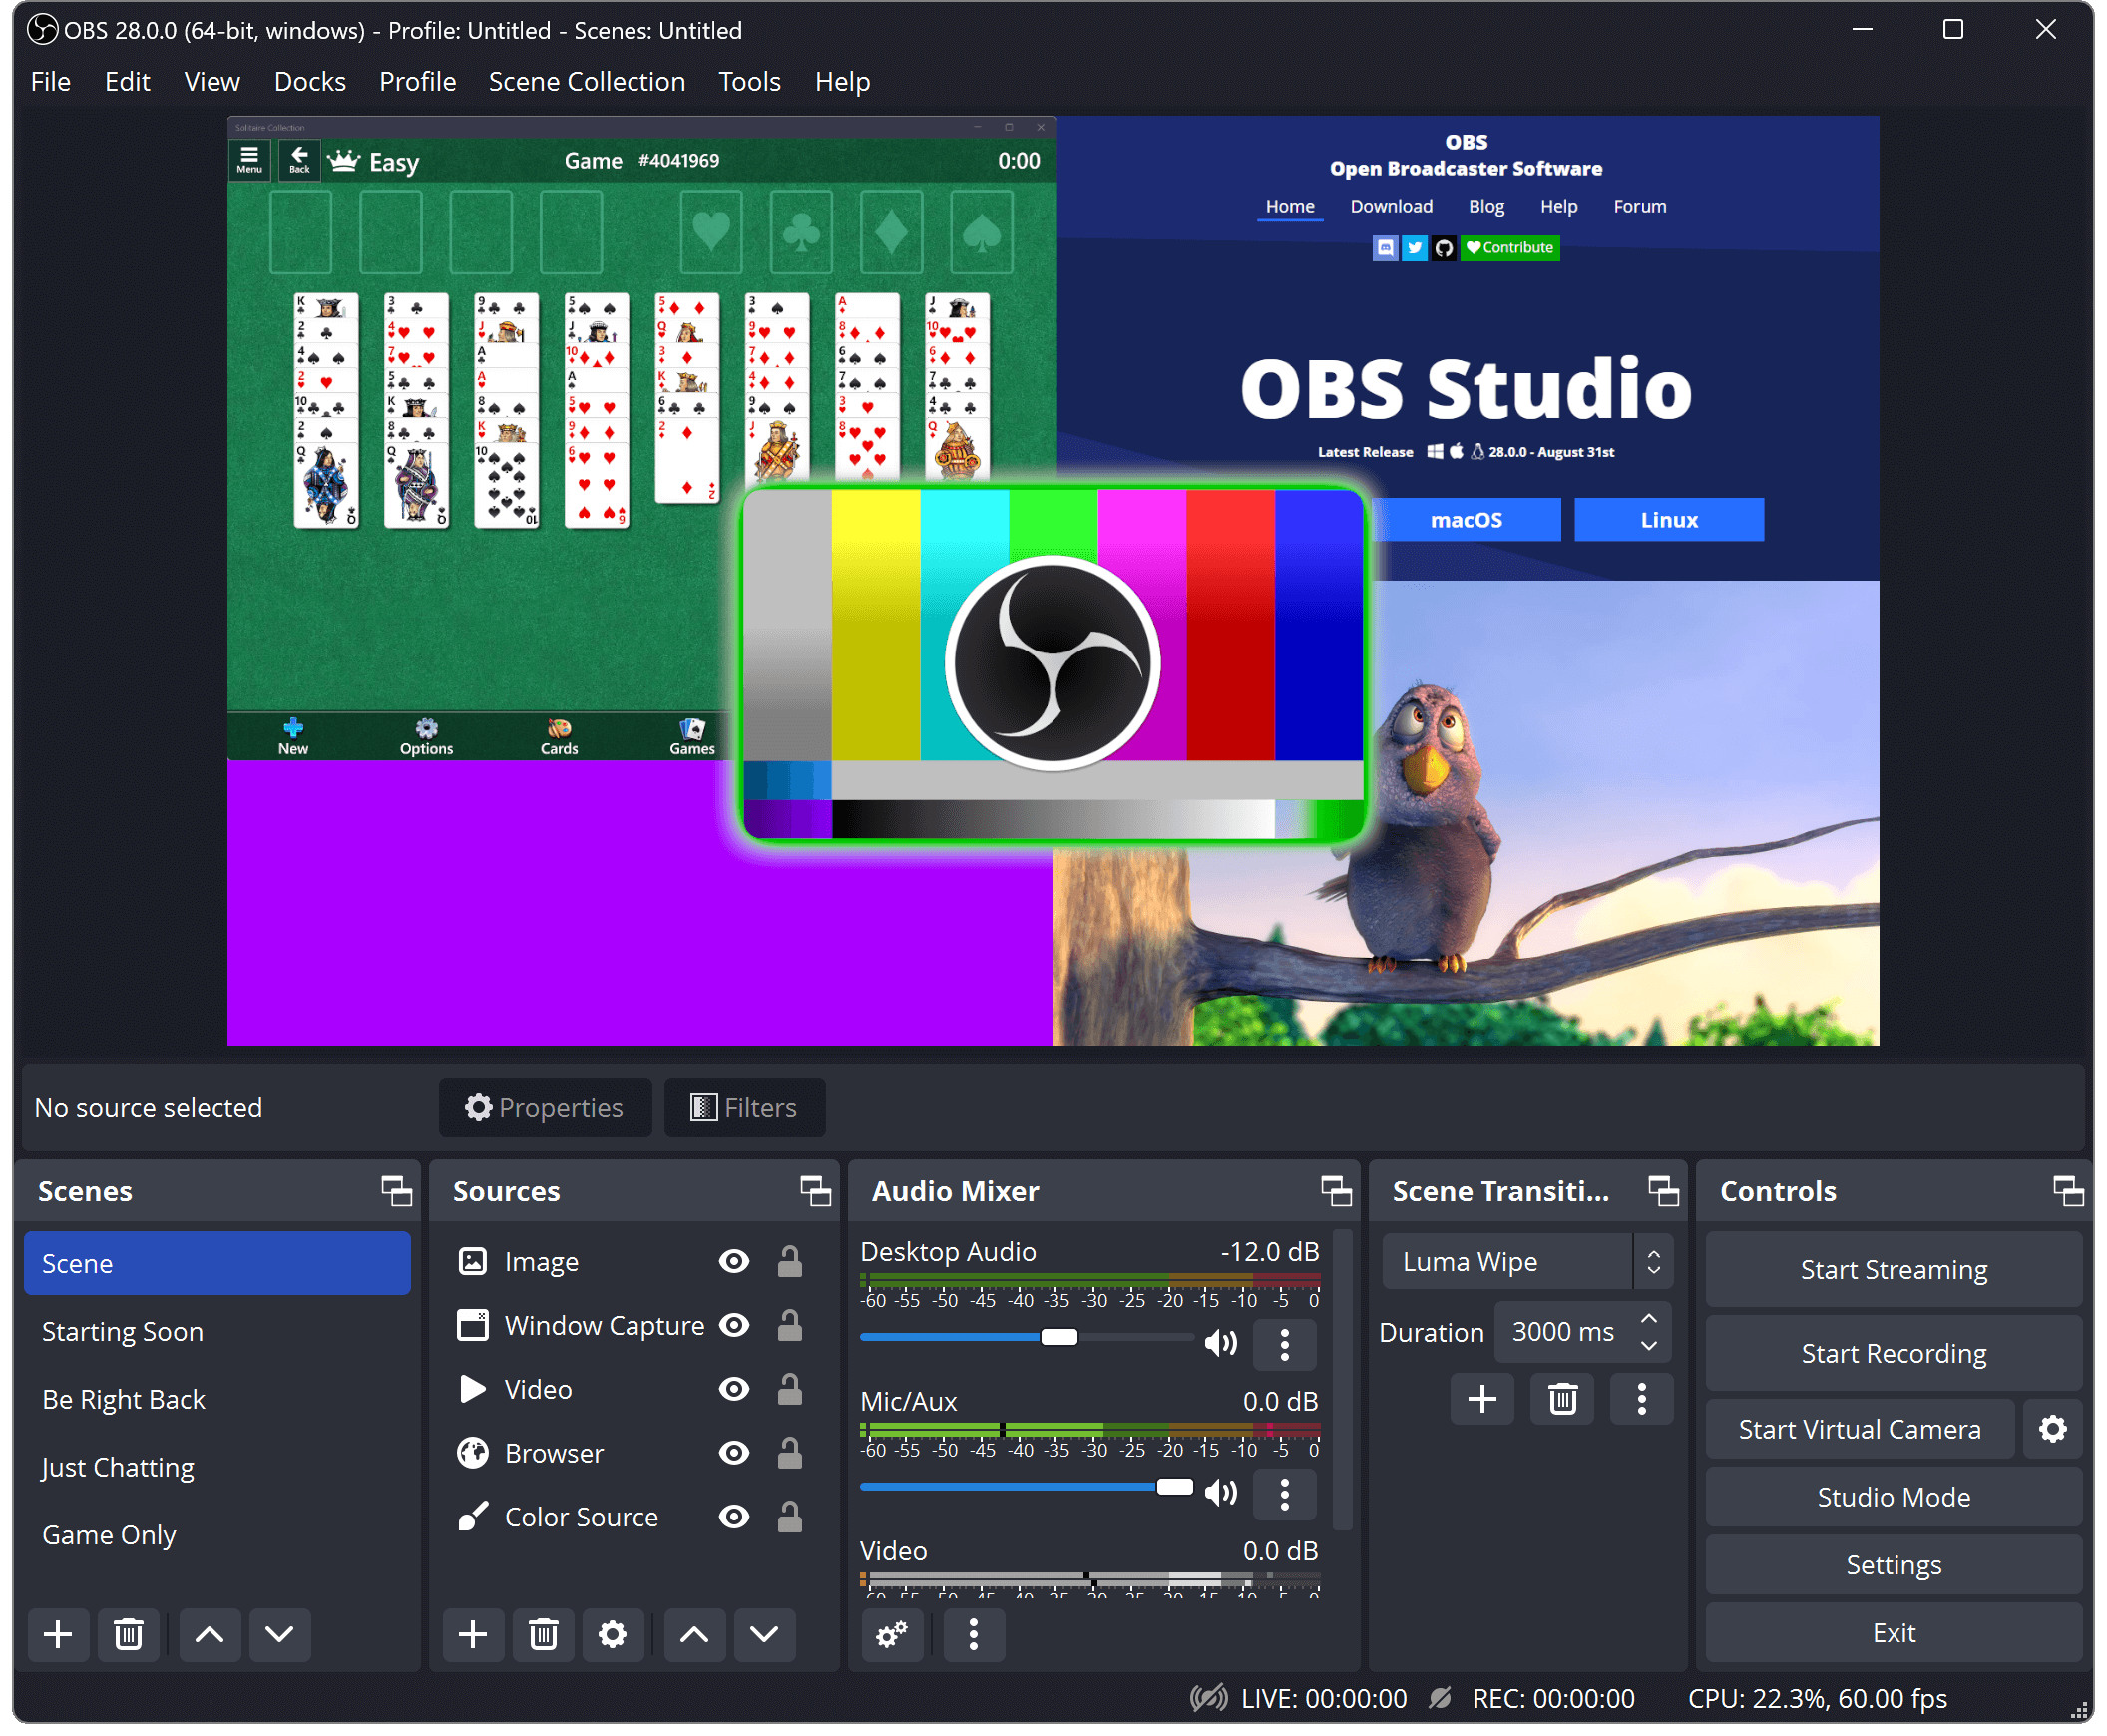
OBS Studio, or Open Broadcaster Software, is a free and open-source application used for video recording and live streaming. It has become a popular choice among streamers, content creators, and professionals who want to produce and share high-quality video. This tutorial will guide you through installing, setting up, and using OBS Studio so you can start creating your own content.
What is OBS Studio?
1 is a powerful tool that lets users record and stream video in real time. It supports various video sources and capture methods, making it ideal for both gaming streams and professional presentations. The software is available on multiple platforms, including Windows, macOS, and Linux, making it accessible to a wide audience.

Key features of OBS Studio
Some of the most notable features in OBS Studio include:
- Multi-scene setup: You can create and switch between multiple scenes during live streaming.
- Diverse sources: Integrate video, images, text, and browser sources into your scenes.
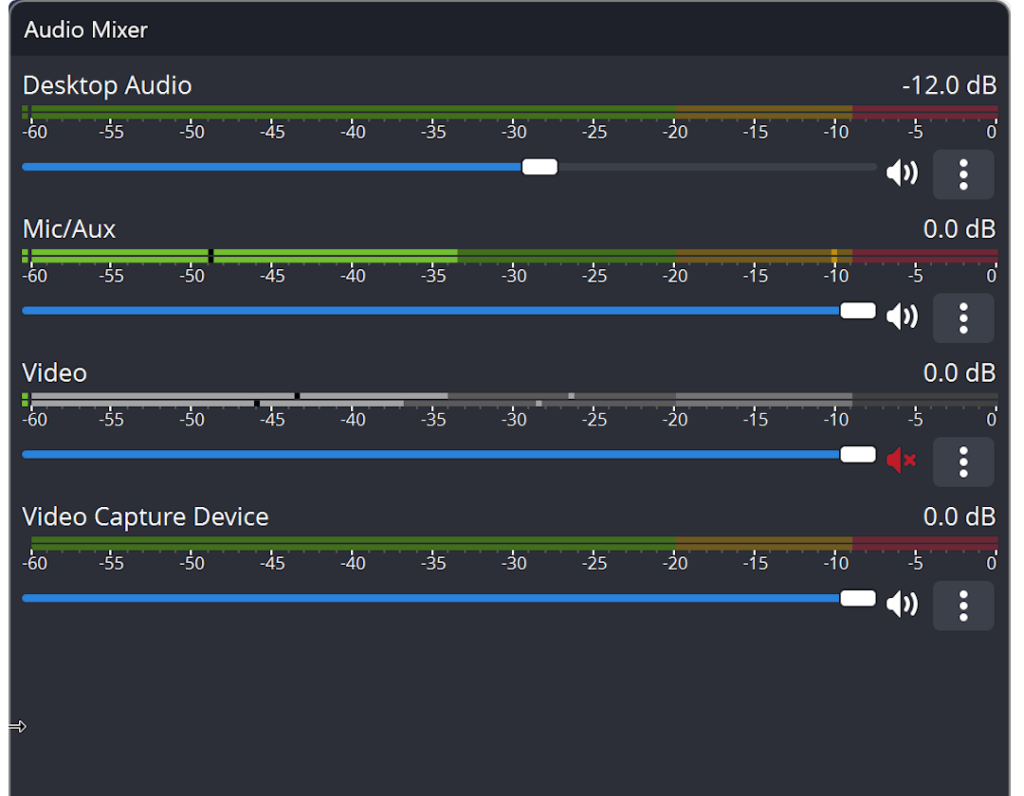
- Audio Mixer: Adjust and control audio from different sources with an intuitive mixer.
- Interactive overlays: Add graphics and animations to enhance your content.
Benefits of using OBS Studio
There are several advantages to choosing OBS Studio as your primary tool for streaming and recording. First, it is completely free, making it accessible to everyone, regardless of budget. It is also open-source, meaning the community contributes to improving and updating the software regularly. In addition, OBS Studio offers extensive customization options, so you can tailor your setup to your specific needs.
Installing OBS Studio
System requirements
Before downloading OBS Studio, make sure your system meets the necessary requirements. Generally, you’ll need:
- Windows 8 or newer, macOS 10.13 or newer, or a modern Linux distribution
- A dual-core processor or better
- 4 GB RAM or more
- A graphics card that supports DirectX 10.1 or OpenGL 3.3
Download and installation steps
To install OBS Studio, follow these steps:
- Go to our OBS Studio download page.
- Choose the version that matches your operating system.
- Download the installer and run it on your system.
- Follow the setup wizard to complete the installation.
Configuring settings after installation
When the installation is complete, OBS Studio will open for the first time. It’s recommended to go through the setup wizard, which helps configure basic settings based on your system and needs. Important settings include choosing streaming and recording formats, which can affect the quality and size of your recordings.
Using OBS Studio
Creating a new scene
A scene in OBS Studio is a collection of sources displayed on screen. To create a new scene, click the plus icon in the “Scenes” panel and give your scene a name. Then you can start adding sources to your new scene to control exactly what appears during your stream or recording.
Adding sources to your scene
Sources can include video captures, screen shares, images, or even text overlays. To add a source, click the plus icon in the “Sources” panel and choose the type of source you want to add. After configuring the source, you can adjust its size and position to create the layout you want.
Setting audio and video options
It’s important to configure audio and video settings correctly to ensure the best quality for recording or streaming. In the Settings menu, you can choose output quality, bitrate, and resolution. The audio settings let you select audio devices and fine-tune levels for optimal sound quality.
Streaming with OBS Studio
Setting up streaming platforms
OBS Studio supports a range of streaming platforms such as Twitch, YouTube, and Facebook Live. To configure a platform, go to “Settings,” select “Stream,” and pick your platform from the drop-down menu. You’ll then need to enter your stream key, which you can find in your account on the selected platform.
Configuring stream settings
Once your platform is set, make sure you have the right bitrate and resolution for streaming. It’s also a good idea to run a test stream so you can fine-tune settings if you encounter quality or stability issues.
Starting live streaming
When everything is configured, you’re ready to go live. Simply click the Start Streaming button in OBS Studio. Remember to keep an eye on chat and interact with your viewers to build an engaging environment. Be prepared with your content and have a plan for structuring your stream.
Recording with OBS Studio
Recording settings
To record video with OBS Studio, first configure your recording settings. Go to Settings and select “Output.” Here, you can choose the recording format, quality, and save location. It’s recommended to choose a format like MP4 for easy sharing and editing.
Recording video and audio
When your settings are configured, you can start recording. Click Start Recording to capture video and audio. You can also record in the background while streaming, allowing you to repurpose content later. Keep an eye on recording time to avoid unexpected endings.
Save and edit recordings
When you finish recording, save the file to your chosen location. OBS Studio also lets you edit recordings using other video editing software. Be sure to organize your recordings properly so you can easily find and edit them later.
Troubleshooting in OBS Studio
Common issues and fixes
As with any software, issues can occur with OBS Studio. Common problems include low video or audio quality, connection issues during streaming, or trouble adding sources. It’s recommended to check your settings, update to the latest version, and look for solutions in the OBS Studio’s official forum or support documentation.
Support and resources
OBS Studio has an active community where users can get help and share experiences. The official OBS Studio forum, Reddit communities, and YouTube tutorials are valuable resources for solutions, tips, and tricks to improve your streaming and recording workflow.
Conclusion
Summary of OBS Studio’s features
OBS Studio is a versatile and powerful tool for both streaming and recording, offering extensive options for customization and control. From setting up scenes to recording video and live streaming, OBS Studio provides the tools you need to create professional content.
Future updates and possibilities
OBS Studio continues to evolve with regular updates and new features. User feedback plays an important role in this process, so it’s worth keeping up with the latest versions and features that can further improve your experience.
FAQs
1. Is OBS Studio free?
Yes, OBS Studio is completely free and open-source, making it accessible to everyone.
2. Can I use OBS Studio to record games?
Yes, OBS Studio is very popular among gamers and is designed to record and stream games with high quality.
3. Which platforms can I stream to with OBS Studio?
You can stream to platforms like Twitch, YouTube, Facebook Live, and many more.
4. How can I improve audio quality in OBS Studio?
To improve audio quality, adjust settings in the audio mixer, use external microphones, and ensure levels are properly set.
5. Where can I find support for OBS Studio?
You can find support on the official OBS Studio forum, Reddit, and through various YouTube tutorials.