MSI Afterburner makes it easy to fine-tune your graphics card
MSI Afterburner is one of the most popular Windows tools for GPU monitoring, overclocking, and fan control. If you game on PC, test hardware, or simply want to track temperatures and FPS, it’s a utility that quickly becomes a staple on your system.
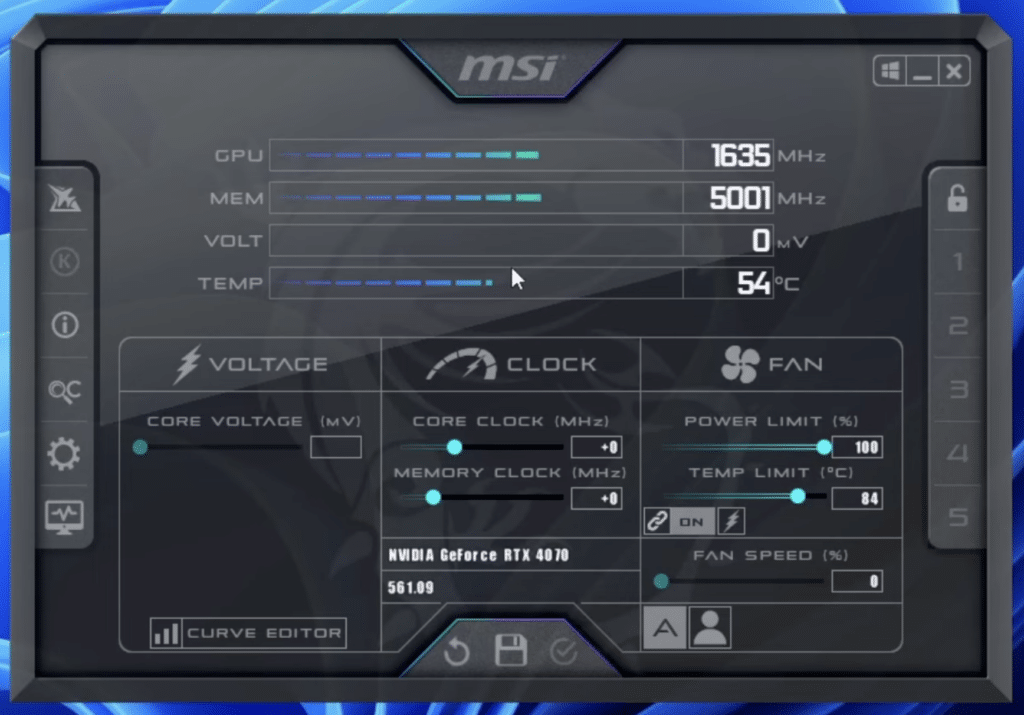
We tested MSI Afterburner on a Windows 11 gaming PC with a modern NVIDIA card, and it’s still one of the first apps we install after the graphics driver. Not because everyone needs to overclock, but because it offers an unusually clear view of temperatures, clock speeds, utilization, and frame rate without feeling heavy or bloated. The in-game overlay, in particular, makes a real difference in everyday use.
What can MSI Afterburner do?
MSI Afterburner is typically used for three things: monitoring, tuning, and troubleshooting.
The best-known feature is, of course, overclocking. You can raise the GPU core clock and memory clock to squeeze a little more performance out of your card. For some, that’s still half the fun of owning a gaming PC. In practice, though, just as many people now use it for the opposite: undervolting. That’s become much more popular among users who want lower temps, less noise, and more consistent performance in demanding games.
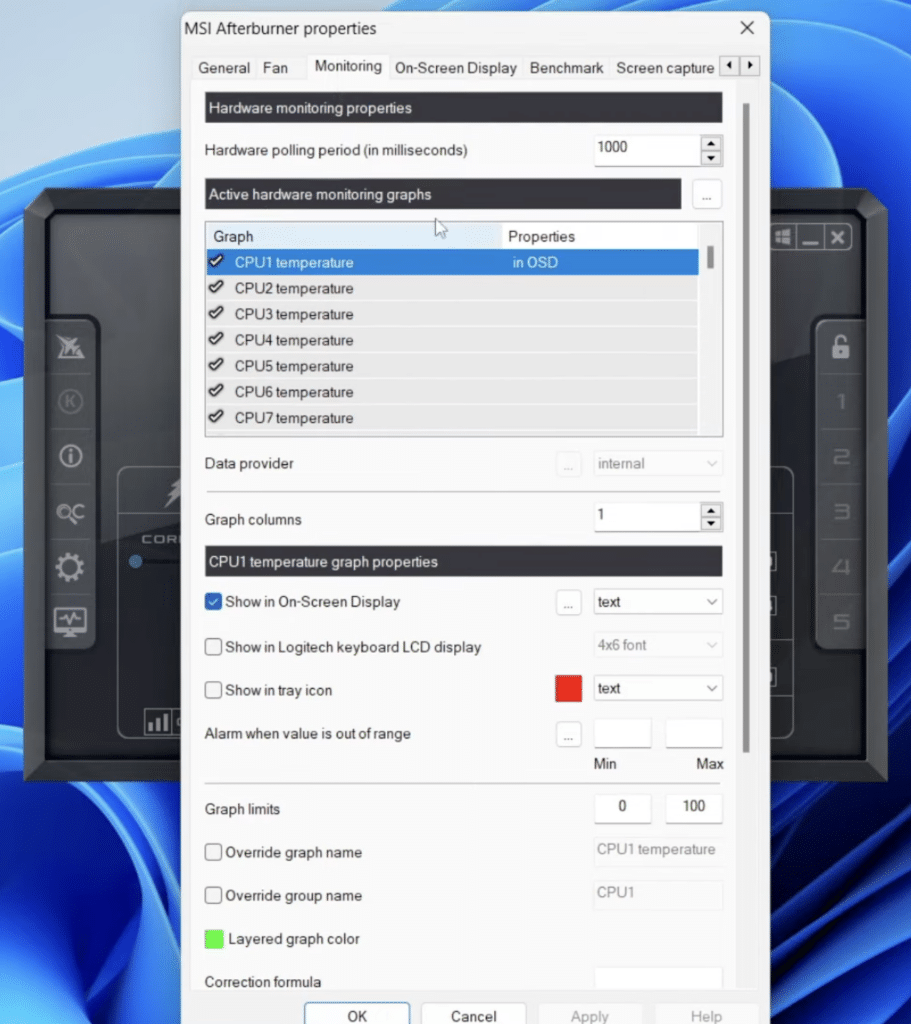
The app also works very well as a monitoring tool. You can track temperature, GPU usage, VRAM usage, power draw, fan speed, and FPS in real time. That makes it much easier to tell whether a game is CPU- or GPU-limited, whether a card is throttling, or whether a fan profile needs adjusting.
The in-game overlay is still one of its best features
The best thing about MSI Afterburner in our view is still the overlay together with RivaTuner Statistics Server (RTSS). This is where the program goes from “very nice” to genuinely useful day to day.
When the overlay is configured properly, you can see exactly the data you want right inside your game. That might be FPS, frametime, GPU temperature, CPU load, RAM usage, or something else entirely. We especially rely on it when testing new games, graphics settings, or drivers, because you can immediately see whether your changes make a real difference.
This is also where MSI Afterburner hits a sweet spot many other tools miss. It doesn’t just feel like a benchmarking app. It feels like something you can actually use every day.
Fan control and profiles make a real difference
Fan control is another big reason many choose MSI Afterburner. Default profiles from GPU vendors aren’t always well balanced. Some cards run hotter than necessary, while others make more noise than they need to.
With a custom fan curve, you decide how cooling responds to temperature. In our testing, this helped most on an older gaming PC where the stock profile let the card get warmer than we liked. A more aggressive curve dropped temps quickly—though you’ll want to strike a balance so the system doesn’t end up sounding like a hair dryer.
Profiles are handy, too. You can save one profile for gaming, one for quiet operation, and one for testing. It sounds minor, but once you start using it, it’s hard to go back.
Is MSI Afterburner safe?
Yes, MSI Afterburner is safe to use as long as you download it from the official source and make sensible changes. MSI warns about fake Afterburner sites and points to MSI and Guru3D as the correct sources.
The software won’t damage your GPU by itself—it all depends on how you use it. If you push clocks and voltage too aggressively without stability testing, you can run into crashes, artifacts, or instability. The best approach is still to make small changes and test as you go.
For most users, the safest starting point isn’t overclocking—it’s monitoring, and maybe a conservative fan profile. Undervolting is often a better first exercise than traditional overclocking, since the goal is usually a cooler, quieter experience rather than just a higher number.
User experience on Windows
The interface honestly looks a bit old‑school. It has for years. But that’s also part of the charm. The program is compact, fast, and feature‑rich without burying you in animations or bloated “gaming software” layers.
Setup felt straightforward to us, though new users should expect a short learning curve. The overlay, sensor selection, and curve editor can seem technical at first. Spend 20–30 minutes learning it, and the payoff is worth it.
If you only want a simple FPS counter, there are easier options. But if you want serious control over your GPU, MSI Afterburner remains one of the most useful tools on the market.
Who should use MSI Afterburner?
MSI Afterburner is perfect for you if you:
✅ play on PC and want to monitor FPS and temperatures
✅ want to adjust your GPU’s fan curve
✅ want to try overclocking or undervolting
✅ want to test stability after driver updates or hardware changes
✅ want to understand your PC’s behavior in real‑world use
It’s less ideal if you never touch graphics settings, don’t want to test anything manually, and just want a very simple app with no technical choices.
Top 5 tips for MSI Afterburner
Top 5 tips for MSI Afterburner
Get more out of MSI Afterburner with five practical tips we found most helpful during testing on a Windows PC.
See how your card behaves in your own games
The first thing we did in our MSI Afterburner test wasn’t overclocking—it was monitoring. Watch temperature, GPU load, VRAM usage, and FPS in the games you play most. That gives you a much better baseline before you start changing clocks, voltage, or fan curves.
Turn down the noise without losing control
Many GPUs ship with a stock profile that’s either louder than it needs to be or runs a bit too warm. With MSI Afterburner, you can tune the fan curve so the card stays quiet on the desktop and ramps up under load. It made a noticeable difference for us—especially in long sessions where temps would otherwise creep up.
FPS alone doesn’t tell the whole story
The RivaTuner overlay is one of the strongest reasons to use MSI Afterburner. Configure it to show FPS, frametime, GPU temp, CPU usage, and VRAM so you can see what’s actually limiting performance. It’s especially helpful when a game stutters even though the FPS number looks fine.
One profile for gaming and one for quiet operation
It’s a small feature that saves time. Keep one profile for demanding games, another for low noise, and a third as a safe default. That way, you don’t have to tweak settings manually every time. It’s especially useful if you use your PC for work, streaming, and gaming.
Benchmarks are fine, but they can be misleading
A card can pass a quick benchmark and still crash later in a demanding game. Always validate your changes in the games you actually play. Run both a benchmark and a longer play session before you trust a new overclock or undervolt profile.