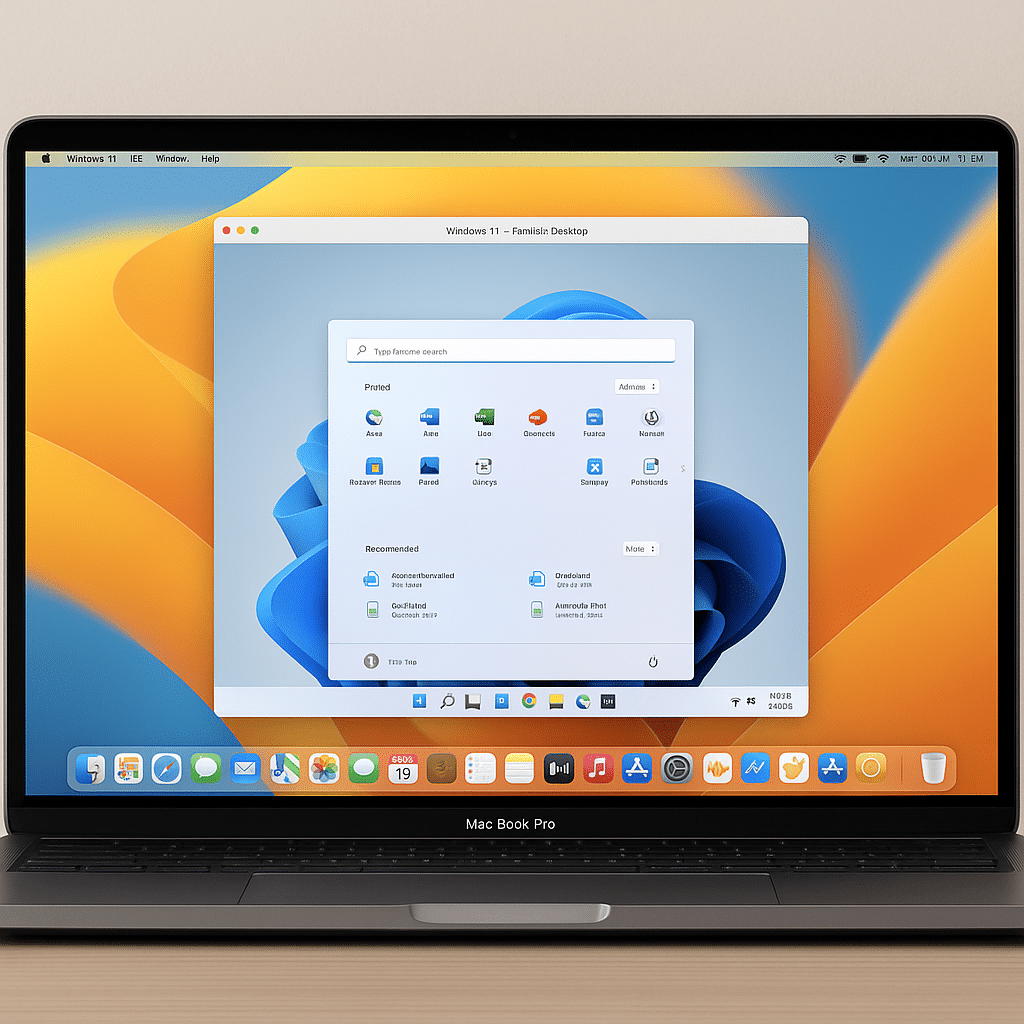
Run Windows on your Mac with Parallels Desktop for Mac.
Parallels Desktop is one of the most popular virtualization solutions for Mac users who want to run Windows, Linux, or older versions of macOS side by side with their primary system—without restarting.
The app is known for its ease of use, blazing performance, and deep macOS integration, making it a smart choice for everyday users and professional developers alike.
Features and integration
Parallels Desktop makes it possible to:
- Run Windows apps like native Mac apps
- Drag files and copy text directly between systems
- Access Boot Camp partitions
- Use hardware such as printers, cameras, and USB devices across both
- Use different view modes (Coherence, Full Screen, Windowed)
The software is continuously optimized for the latest versions of both macOS and Windows, and it also supports Apple silicon (M1, M2, and M3)—a big plus at a time when many competitors are still catching up.
Who is Parallels Desktop for?
This app is ideal for:
- Mac users who need Windows software (e.g., accounting tools, Microsoft Office versions, specialized software)
- Developers who want to test across platforms
- Businesses and students working in hybrid IT environments
Installing Windows through Parallels is simple—it takes just a few clicks, with guided setup from start to finish.
Performance and user experience
Parallels Desktop is known for its high performance. In the latest versions, performance has been optimized so both Windows 11 and heavy apps like AutoCAD, Visual Studio, and Adobe Creative Cloud run smoothly. On M1 and M2 Macs, Parallels leverages ARM-based Windows with impressive speed and compatibility.
Pricing and licensing
Parallels Desktop comes in several editions:
- Standard Edition: for home use
- Pro Edition: for developers and power users
- Business Edition: with advanced IT administration
Licenses are available as an annual subscription or a one-time purchase, depending on your needs.
Tips and tricks for Parallels Desktop
Parallels Desktop is packed with features that can boost both your performance and workflow. Here are some smart tips you might not know:
- Use the Snapshot feature before major updates in your VM
Snapshots let you quickly restore your virtual machine if a Windows update or software install goes wrong. Take a snapshot before you experiment—it saves time and headaches. - Enable "Coherence Mode" for a true Mac experience
Coherence Mode hides the Windows desktop and lets Windows apps run as if they were Mac apps—right in the Dock and with macOS shortcuts. Perfect for mixed workflows without visual clutter. - Use "Resource Limits" to tune CPU and RAM
If you want to prevent your VM from eating all system resources, manually set how many CPU cores and how much RAM Parallels can use. It balances performance between macOS and the VM. - Turn off shared folders and devices for better security
If you work with sensitive files in either Windows or macOS, consider disabling shared folders, printers, and USB devices. It creates clearer separation and prevents accidental access. - Install Parallels Toolbox for extra utilities
Parallels Toolbox gives you 30+ handy tools for screen recording, Do Not Disturb, image optimization, and file management. They work across both Mac and Windows to simplify daily tasks. - Auto-start a VM at macOS login for faster access
You can choose a specific virtual machine to start automatically with macOS. It saves time—especially if you often use one Windows installation for work. - Use a shared clipboard for easy copy-paste between systems
Enable automatic sharing of text, images, and files via the clipboard. It makes transferring items quick without manual export/import. - Tune graphics settings for games and demanding apps
In the VM settings, you can tailor GPU resources and resolution if you play games or use intensive software. Parallels now supports DirectX 11 and OpenGL 3.3—crucial for many 3D apps. - Switch between different network modes
Choose whether your VM should be on the same network as your Mac, have its own IP, or be fully isolated. Use this for test environments, VPN, or segregated browsing. - Store your VMs on an external drive to free up space
Low on disk space on your MacBook? Move your virtual machines to a fast external SSD—performance is nearly the same and it frees up local storage. - Use "Pause VM" instead of "Shut Down" for short breaks
When you’re stepping away briefly, pausing your VM is smarter than shutting it down. It resumes almost instantly—perfect for efficient workflows.