Arduino IDE – Your gateway to hardware programming.
Arduino IDE is a free, open-source development platform that lets you program microcontrollers quickly and easily. Whether you want to automate your home, build robots, or teach kids about technology, Arduino is a great place to start.
Get started with Arduino
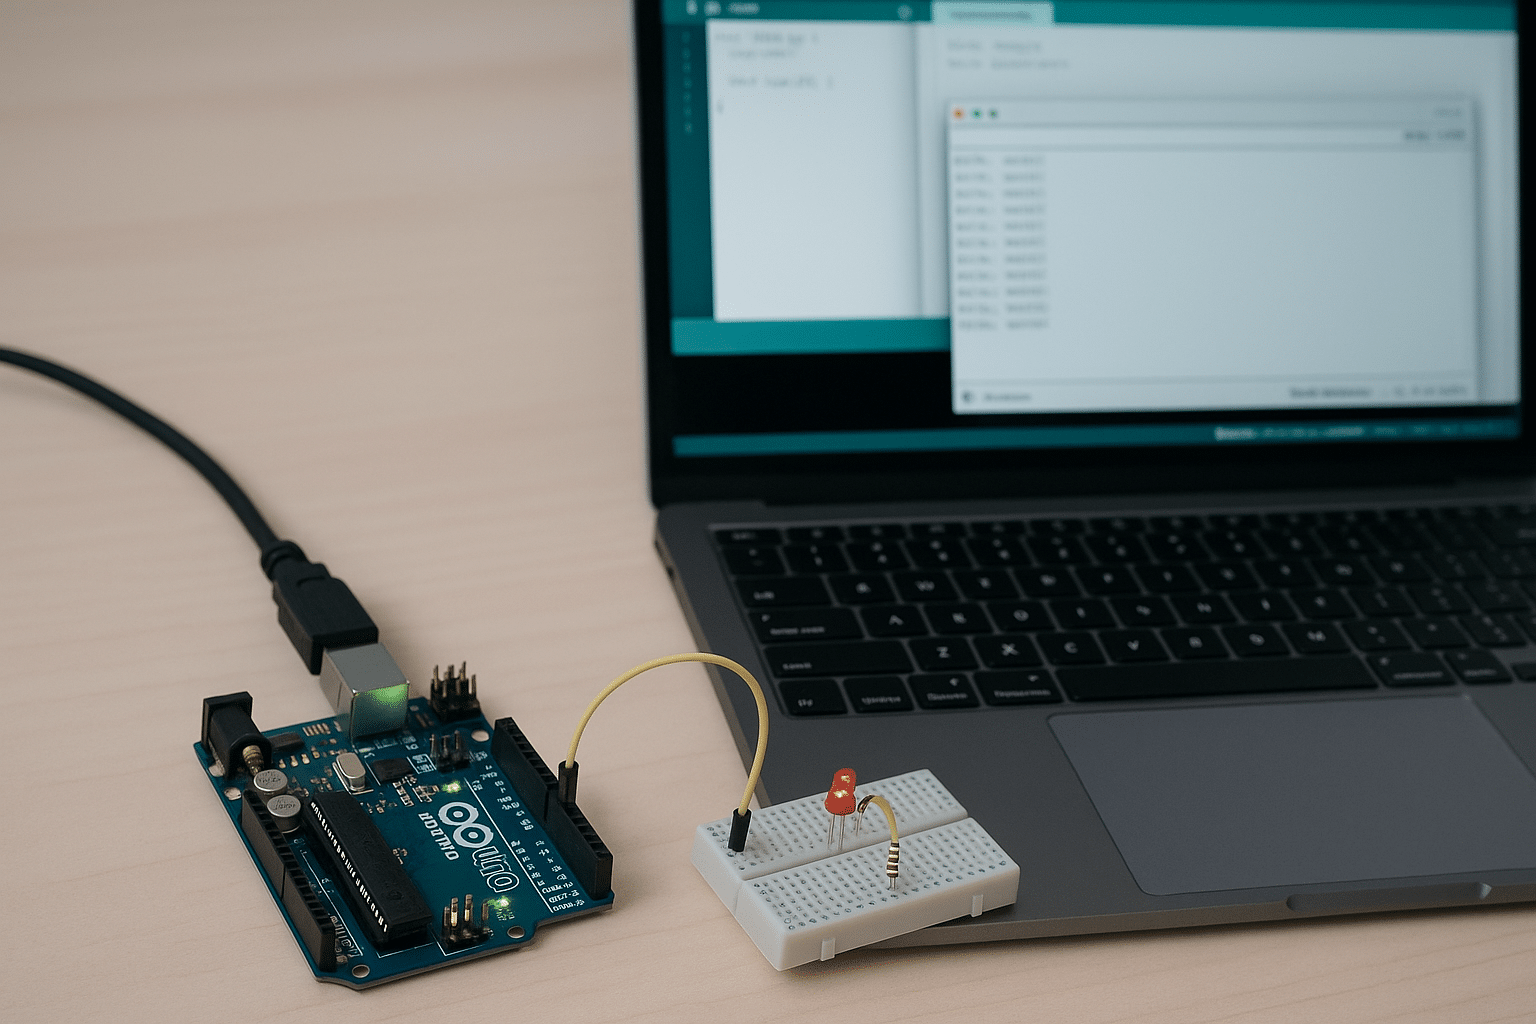
1 has two parts: a physical Arduino board (e.g., Uno, Nano, or Mega) and the Arduino IDE software, where you write and upload your code. You can install it on Windows, macOS, and Linux, and it only takes a USB connection to your board to get started.
Once the board is connected, select it in the menu, and the software automatically manages the connection. Status is shown via small LEDs, and you’ll be notified if anything goes wrong.
Features and user experience
Arduino IDE supports C/C++ and includes features such as:
- Automatic code formatting
- Built-in Serial Monitor and Plotter
- Compile and one‑click upload
- Add libraries and support for external boards
Everything happens in a simple, easy-to-navigate interface that’s also great for teaching and for projects in middle and high school classrooms.
Benefits for beginners and hobbyists
Arduino IDE isn’t just for professionals—it’s designed to be easy to use, even without programming experience. That makes the platform perfect for everything from DIY automation to creative projects like music machines, moisture meters, or smart lighting.
With plenty of examples, tutorials, and a huge global community, help is always close by.
Popular Arduino projects
- Create your own alarm system with a sensor and buzzer
- Build an automatic plant-watering system
- Program an LED cube with custom patterns
- Monitor temperature and humidity with sensors and display it on a small screen
You can find hundreds of guides online—and it all starts with Arduino IDE.
Top five tips and tricks for Arduino IDE
1. Use the example code as a learning tool
Arduino IDE includes built-in examples under File > Examples. You’ll find everything from a simple blinking LED to more advanced sensors. Try them out and use them as the foundation for your own projects.
2. Install libraries directly in the IDE
Go to Sketch > Include Library > Manage Libraries to quickly add features like OLED displays, Wi‑Fi, or motor control. Many components require a specific library—so check the documentation when you buy new parts.
3. Use the Serial Monitor and Plotter for debugging
When your code doesn’t behave as expected, add Serial.print() and view the output in the Serial Monitor. The Plotter also lets you visualize data such as temperature or motion in real time.
4. Organize your projects with tabs
If your code gets long, split it into multiple tabs (files) in Arduino IDE. Each tab corresponds to a new .ino or .h/.cpp file and makes it easier to keep functions and variables organized.
5. Save and reuse your own code blocks
Create your own templates or save frequently used functions as separate files and include them in new projects. It saves time and helps you reuse proven code.